Showing posts with label sewing. Show all posts
Saturday, January 14, 2017
HPQ Sewing Nook
Seven months after moving into this house, I finally have my sewing nook kind of settled, and I thought I'd share it with you. This space also serves as homeschooling command central, but as you can see, the fabric and notions and fabulousness of sewing is waging a good war against the school books and supplies.
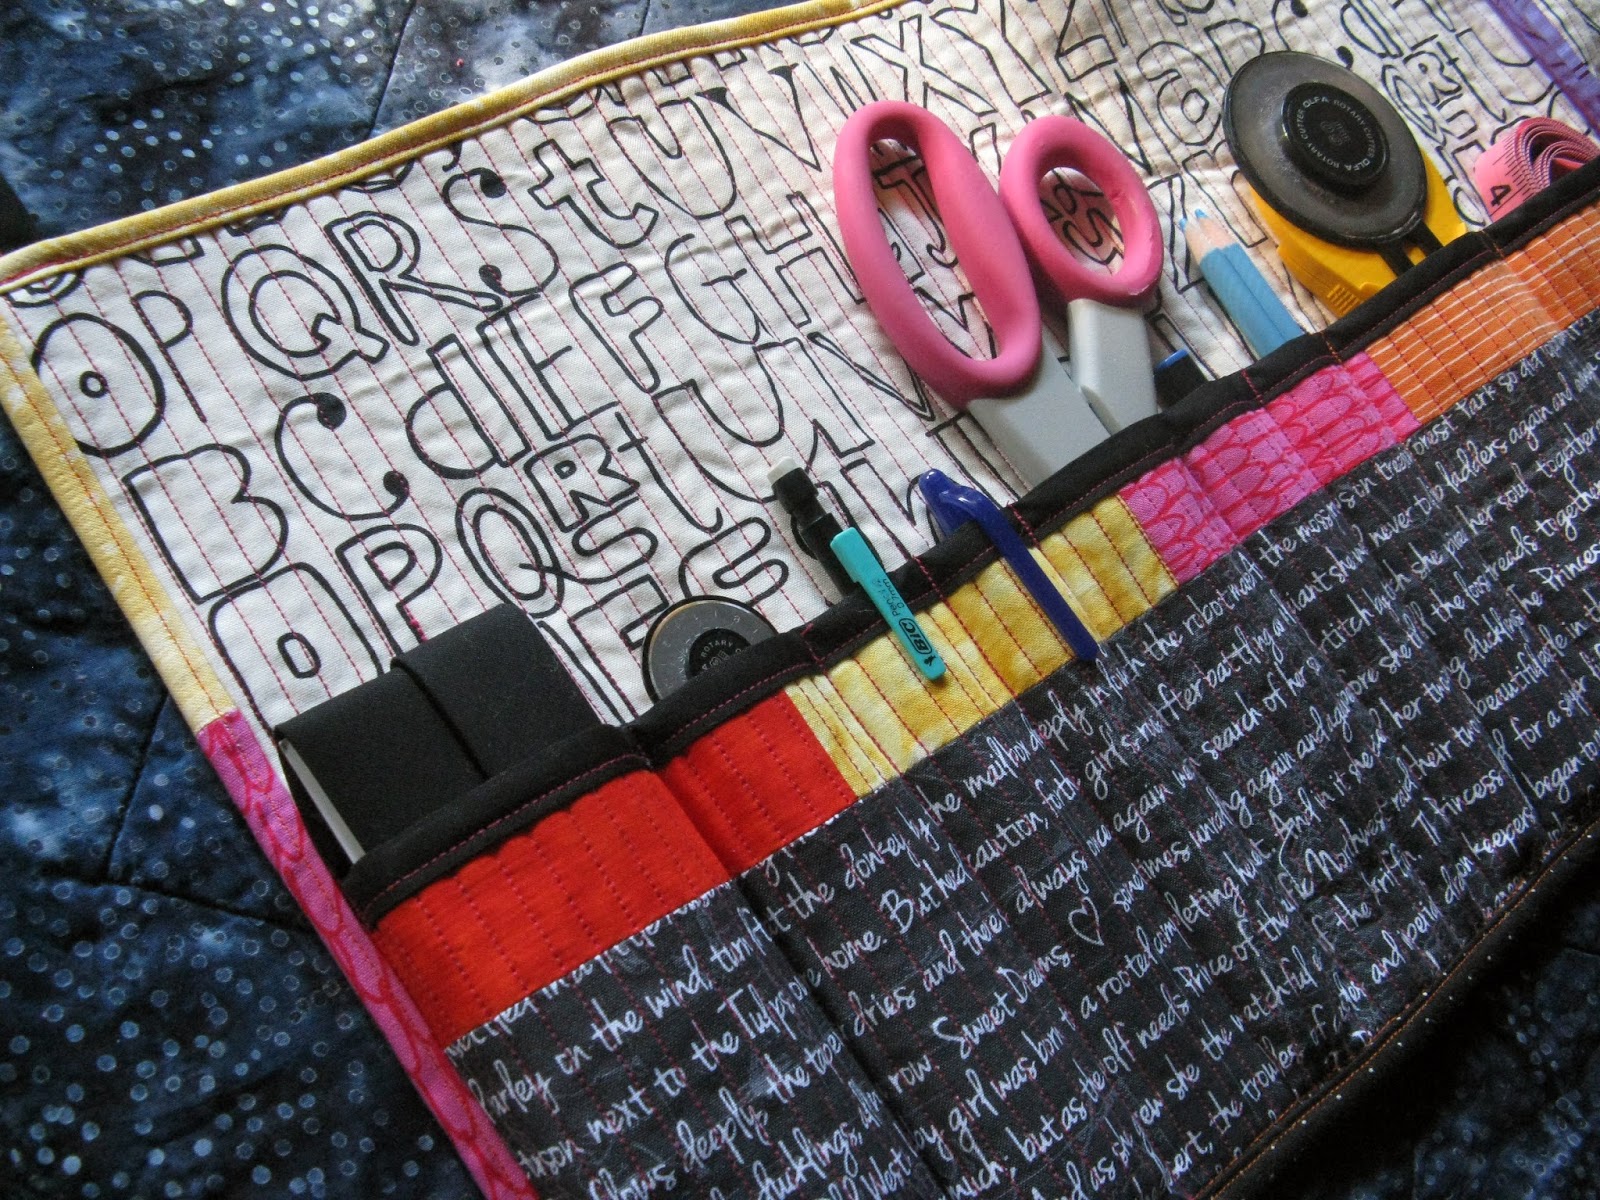
This is my favorite spot, as it has my mini quilts and thread and my sewing tool organizer that has definitely stood the test of time.
With four kidlets--or as my BFF calls them, my clients--I am having to squeeze sewing time in where I can. Sometimes, I only have enough time to cut a few pieces, or iron a cut of fabric or hunt hunt hunt for that elusive pattern piece that I still cannot find. I could see myself getting frustrated with the lack of sewing time, but my clients are a good bunch, and I do genuinely enjoy the SAHM/homeschooling gig. (Most of the time.)
This wall of lovely is the creation of my husband. Well, only the wall itself--all of the fabric goodness is mine with the exception of that stunning lonestar made by Alison for the Coast to Coast Traveling Quilt Bee. My most awesome husband put this together for my Christmas gift, and I can say I am thoroughly enjoying my first design wall. My nook is just off the kitchen, and the mess of color cheers me up when I'm cooking.
Here is the progress I made a couple of days ago. Some cut fabric on the right, and additional fabric on the left that I pulled for this project. I am hoping for some good nap time today to get a bit more done on this project, but we'll see. The baby still sleeps a ton, but the two-year-old has been battling a cold, and nap time hasn't been as long or awesome in the last few days. I've still got to find that pattern piece too!
Friday, November 22, 2013
FF: Advent Goodness.
Hello Lovelies! With winter and dreary weather ahead, I am happy for the loveliness of the quilt blog community. Even if it looks yucky outside--which trust me, it looks yucky outside--I can look at the pretties that my friends have made and check out other quilters' finishes and be surrounded with beauty, even if it is only virtual. So thank you for being a part of that and being a part of my quilt blog!
Sorry to get all mushy there, but it had to be said! And while you may not have visited to hear me wax on about the importance of loveliness, never fear! I do have a finish for you today, and I'm pretty pleased with it, even if the yucky outside doesn't lend a hand to my very amateur photography skillz.
Bam! Advent calendar. I made a really really ugly one last year, which I didn't even use--no, you cannot see a picture of it--and I couldn't bear the thought of that being my only option again this year. I've been looking at advent calendar tutorials since the summer, and when I found one at Skip to My Lou, I knew it was the one for me. The tutorial was really easy to follow, the entire thing was easy to sew, and the most annoying thing about it was cutting all of the fabric and making the color combinations! (Which means, not that annoying at all.)
There is still work to be done, but finishing this a week before Thanksgiving gives me room for that. I wish I had room to spread the envelopes out more, but there just isn't a good place in my house for this. I'm not thrilled with the hanging utensils, but I knew I needed to get an eyeball on what this looked like before I committed to nails, and I'm glad I did. I need to spray paint the mish-mash of clothespins that I picked up for $1.25. I think I still have some chocolate brown paint lurking around somewhere...if not, I'm thinking hot pink, which probably surprises no one. Do I add numbers? There is no way I'm appliqueing them, and I'm trying to decide if it's worth hunting down the numbers (or a similar idea) that Cindy used. Or, I could not, and it wouldn't be too terribly hard to figure out what was what. And because it's less work, I'm leaning towards not. (Lazy, lazy, I know.) Conclusion = there is work to be done.
Now...to decide. To make stockings? Or not to make stockings? I really really think I should. But that means a lot of work and...*sigh.* It never ends, does it?
I'm linking up today with TGIFF at Never Too Hot to Stitch and Finish it Up Friday at Crazy Mom Quilts. See you there.
Sorry to get all mushy there, but it had to be said! And while you may not have visited to hear me wax on about the importance of loveliness, never fear! I do have a finish for you today, and I'm pretty pleased with it, even if the yucky outside doesn't lend a hand to my very amateur photography skillz.
Bam! Advent calendar. I made a really really ugly one last year, which I didn't even use--no, you cannot see a picture of it--and I couldn't bear the thought of that being my only option again this year. I've been looking at advent calendar tutorials since the summer, and when I found one at Skip to My Lou, I knew it was the one for me. The tutorial was really easy to follow, the entire thing was easy to sew, and the most annoying thing about it was cutting all of the fabric and making the color combinations! (Which means, not that annoying at all.)
There is still work to be done, but finishing this a week before Thanksgiving gives me room for that. I wish I had room to spread the envelopes out more, but there just isn't a good place in my house for this. I'm not thrilled with the hanging utensils, but I knew I needed to get an eyeball on what this looked like before I committed to nails, and I'm glad I did. I need to spray paint the mish-mash of clothespins that I picked up for $1.25. I think I still have some chocolate brown paint lurking around somewhere...if not, I'm thinking hot pink, which probably surprises no one. Do I add numbers? There is no way I'm appliqueing them, and I'm trying to decide if it's worth hunting down the numbers (or a similar idea) that Cindy used. Or, I could not, and it wouldn't be too terribly hard to figure out what was what. And because it's less work, I'm leaning towards not. (Lazy, lazy, I know.) Conclusion = there is work to be done.
Now...to decide. To make stockings? Or not to make stockings? I really really think I should. But that means a lot of work and...*sigh.* It never ends, does it?
I'm linking up today with TGIFF at Never Too Hot to Stitch and Finish it Up Friday at Crazy Mom Quilts. See you there.
Thursday, November 14, 2013
Handmade Holidays
Are y'all following the Handmade Holidays series at Sew Mama Sew? It is serious awesomesauce, and I've already bookmarked a handful of tutorials. (Rocking Shoelaces, anyone?)
If you have been following, you may already know this, but my Sewing Tool Organizer Tutorial was up on Tuesday's Handmade Holidays post. Woo! If you're looking for something to make, but you aren't sure what, I'd definitely recommend this series. Yesterday, I discovered the awesomeness that is Wild Olive, and I'm sure before the month is out that I will be following several more blogs and considering several other projects! Yikes! Maybe this is a bad idea...NO! Except, it's a really really good one. Go check it out!
Monday, November 11, 2013
Sewing Space.
A few weeks ago, I was lucky enough to win a print from Regina Lord of Creative Kismet. CK is one of the first creative blogs I followed, and her saturated color palette has always wooed me. I love love love her work. Like, I want to pick up a paintbrush and paint, which is kind of weird since I'm a fabric girl. But I also know that Regina has spent years working on her art and exploring different techniques and mediums, and me picking up a paintbrush is not going to automatically yield such glorious results, so I'll stick with fabric, thankyouverymuch.
But that's all beside the point. When I received my lovely print (thank you!) I knew I had to get it up in my sewing nook, and while I was at it, why not include some other fun things that would make me happy? Regina's work is the third from the left and reads, "Daydream Believer."
It's a happy spot. I seriously recommend checking out Regina's work at Creative Kismet or visiting her etsy shop because she is ridiculously talented and awesomeness. Though if you buy this print and put it in your sewing nook, I will call you a copycat. And if you hang it up next to a picture of me and my quilting sensei, K, well, probably don't tell me. I don't think I could handle that.
Hanging up these pretties inspired me to clean up my sewing area--which was getting a little intense--and snap a photo. The last photo I showed y'all was some time ago, and I've moved to a different, larger nook of the room since. The light isn't so good here, but sometimes in the morning, if the sun is up, I get a beautiful bit of light, and I've been enjoying that recently.
I'll be back on Wednesday with a WIP post since it's been awhile, and don't forget--and this is oh so important--COME BACK on Friday as I'm hosting TGIFF, and I'll have a super big (literally, it's super big) finish to share with you, and of course I want to see yours too!

Wednesday, May 1, 2013
WIP: Dress Edition.
This week, I started working on my dress for my sister-in-law's wedding, eep! Perhaps this wasn't the best event to jumpstart my dressmaking career, but it does seem like a typical Audrey move. "Oh, I have a really nice wedding to attend! Why not try to make a dress for the first time? Because that sounds like the greatest idea ever!"
The above reads like sarcasm...and it kinda sorta is...but I'm also kinda serious....
I'm making the Jamie Dress by SisBoom, and I've finished everything except the bottom hem and the strap attachment. Because my fabric (Anna Maria Horner Innocent Crush in voile, yum!) is so sheer, I opted to fully line the skirt as well as the bodice, meaning I had the audacity to make a change to the pattern, which seems like crazy talk to me because what the heck do I know about sewing dresses, let alone, pattern-modifying? (The answer is nothing, Friends. Absolutely nothing.)
There have been some really really really (times a kajillion) frustrating moments, but they were all of my own doing. I nearly gave up when I sewed my basting stitches yesterday before attaching the lining fabric to my skirt. Then, I nearly cried when I ripped everything out, attached the lining, sewed another set of basting stitches, and got halfway through the gathering only to have my thread snap. Oy vey, people! Dressmaking is hard!
I'm sure it doesn't surprise you that I went for a pink zipper. The zipper assembly was fairly simple, and while it's not *perfect*, it's close enough, and that's all that matters to me! I doubt anyone is going to come up to me at the wedding and say, "Your zipper isn't inserted perfectly. There is totally a millimeter of error right here." And if they do, I will stab them in the eye with my fork or stiletto heel, whichever is more convenient.
I need my dear sweet husband to help me get the straps figured out since I think that will be too much for me to do solo, but otherwise, this dress--for good or for evil--is in the bag.
I'm linking up with WIP Wednesday at Freshly Pieced. I hope to return to regularly scheduled quilty programming next week!
Friday, November 16, 2012
Super Weekend.
Hi Friends! It's Friday (woo woo!)
I finished up my first superhero cape this afternoon. (I even topstitched around the edges because I like to believe my almost 2 year old nephew will notice the added touch of fabulous.) There are a bunch of tutorials for capes online, but to be honest, I didn't like any of them, so I had my sister measure my niece and nephews to see where their capes should fall, and I took that measurement and started cutting fabric. Aren't I ever so bold and reckless?
I tried to get some shots this afternoon, but the weather outside is gray and dark, and this is as good as it's going to get. Also, my oldest son, who has decided that he loves the cape, wouldn't stop moving, so all of the photos I did take are blurry. It's sad because you won't get to see the lovely stippling I did in the green diamond around the C, but be strong as I'm sure there will be more to come.
Three more capes to go! What are you planning to do with your weekend?
I finished up my first superhero cape this afternoon. (I even topstitched around the edges because I like to believe my almost 2 year old nephew will notice the added touch of fabulous.) There are a bunch of tutorials for capes online, but to be honest, I didn't like any of them, so I had my sister measure my niece and nephews to see where their capes should fall, and I took that measurement and started cutting fabric. Aren't I ever so bold and reckless?
I tried to get some shots this afternoon, but the weather outside is gray and dark, and this is as good as it's going to get. Also, my oldest son, who has decided that he loves the cape, wouldn't stop moving, so all of the photos I did take are blurry. It's sad because you won't get to see the lovely stippling I did in the green diamond around the C, but be strong as I'm sure there will be more to come.
Three more capes to go! What are you planning to do with your weekend?
Friday, April 13, 2012
Meet Agatha.
Have you met Agatha?
She is my super cool Singer sewing machine that was built SIXTY YEARS AGO.
Yeah, she's kind of a big deal.
I learned to sew on my Mama's 1970's Singer, but that baby was nothing compared to Agatha.
And while she doesn't have a walking foot or a bunch of fancy accessories or even a zigzag stitch, I love sewing on her. Making quilts with the sewing machine that my husband's grandmother (the original and only other owner) gave me is super fierce.
Also, for being sixty years old, Agatha is quite the looker. My friend D took some photos of her awhile back, and he's posted them on his photo site. Go take a look!
She is my super cool Singer sewing machine that was built SIXTY YEARS AGO.
Yeah, she's kind of a big deal.
I learned to sew on my Mama's 1970's Singer, but that baby was nothing compared to Agatha.
And while she doesn't have a walking foot or a bunch of fancy accessories or even a zigzag stitch, I love sewing on her. Making quilts with the sewing machine that my husband's grandmother (the original and only other owner) gave me is super fierce.
Also, for being sixty years old, Agatha is quite the looker. My friend D took some photos of her awhile back, and he's posted them on his photo site. Go take a look!
Tuesday, March 13, 2012
glider pillow.
Last night, I really did intend to go to bed at a reasonable time. With Banzo's inconsistent nighttime sleeping and occasional screaming episodes (night terrors?) it seemed like the smart thing to do. I told myself I would just square up the half-square triangles for my glider pillow. I could start piecing them later....
After I had 16 done, then I figured that perhaps I should maybe start the sewing, but I wouldn't pull out my iron and ironing board since I could start pressing seams and finish the sewing later. When those were sewn, I didn't want to leave the seams looking so yucky, so I figured I would run the iron over them really quickly and then I could go to bed, really!
I'm pretty sure you've caught on by now, but when I finally stumbled into bed at close to 11, I had finished piecing the front of my glider pillowcase. (I did show some restraint and keep from sewing the envelope closure.) I'm happy to report that while we are still not BFFs, I seem to have forged some semblance of truce with the HSTs, and my corners are either perfect, or so close, I can't be bothered to change them or care! As you can see, I was tired at the end of this process, and my ironing is not gorgeous, but I'm excited nonetheless. I did stay up a few extra minutes to sort through my stash and see if I have any fabric to use for the back, and I'm planning on a chocolate and white large scale polka dot print that was actually used for Banzo's crib bedding. I may just take the time today to start working on that. (Oh, who am I kidding? Certainly not myself! I expect this puppy will be done tonight.)
Instead of cutting 16 HSTs, I accidentally cut 32, so now the question is, do I hang on to them and find another project or make another pillow, but maybe flip the white and pink? So. Many. Options!
I did finish piecing my solids quilt top, and I think I've decided to use the leftover solids fabric as the binding fabric. When talking to K, she had suggested a batik, which I think is genius, but I have the solids fabric, and I should be a twinge more conservative in my fabric purchasing and maybe just buy the batik for backing fabric instead? The added benefit to that plan is that I'll get to use more of it!
After I had 16 done, then I figured that perhaps I should maybe start the sewing, but I wouldn't pull out my iron and ironing board since I could start pressing seams and finish the sewing later. When those were sewn, I didn't want to leave the seams looking so yucky, so I figured I would run the iron over them really quickly and then I could go to bed, really!
I'm pretty sure you've caught on by now, but when I finally stumbled into bed at close to 11, I had finished piecing the front of my glider pillowcase. (I did show some restraint and keep from sewing the envelope closure.) I'm happy to report that while we are still not BFFs, I seem to have forged some semblance of truce with the HSTs, and my corners are either perfect, or so close, I can't be bothered to change them or care! As you can see, I was tired at the end of this process, and my ironing is not gorgeous, but I'm excited nonetheless. I did stay up a few extra minutes to sort through my stash and see if I have any fabric to use for the back, and I'm planning on a chocolate and white large scale polka dot print that was actually used for Banzo's crib bedding. I may just take the time today to start working on that. (Oh, who am I kidding? Certainly not myself! I expect this puppy will be done tonight.)
Instead of cutting 16 HSTs, I accidentally cut 32, so now the question is, do I hang on to them and find another project or make another pillow, but maybe flip the white and pink? So. Many. Options!
I did finish piecing my solids quilt top, and I think I've decided to use the leftover solids fabric as the binding fabric. When talking to K, she had suggested a batik, which I think is genius, but I have the solids fabric, and I should be a twinge more conservative in my fabric purchasing and maybe just buy the batik for backing fabric instead? The added benefit to that plan is that I'll get to use more of it!
Friday, March 9, 2012
gifts.
I didn't really do much in the way of new year's resolutions for 2012. Nothing against them, and I've certainly had them in the past, but this year, I wasn't really in a resolution-y mood. I figured having a new baby would encompass everything, so why make huge plans? He'll be enough of a life-changer.
That being said, I did decide that this year I wanted to start making more gifts. The plan is that it will encourage me (hopefully) to plan ahead for birthdays instead of waiting until the last minute and then freaking out because I can't think of a gift. I made these things awhile back, but I needed to make sure their recipients had received them before posting photos.

I found this tutorial from In Color Order for a drawstring bag. You may have seen them around. They are popping up everywhere! I've made three so far, but the third (my personal favorite) is waiting to be gifted, so no sharing just yet. I made these two from a stack of five fat quarters. I used ribbon instead of fabric for the drawstring, mostly because I have a huge tin full of reams of ribbon, and it seems like a smart idea to actually start using it instead of just purchasing it when its on clearance. I really do love these bags, and hopefully I'll get around to making myself some soon.
Speaking of gifts, I've been trying to use more gifts bags because hopefully they are re-used by their recipients, but wouldn't these also work as great gift bags? Let's be honest, I also adore bagging stuff because it's much much faster than wrapping with paper. Hopefully I'll get around to making some of these before the holidays.
Inside of these two bags, I included a box of tea and a mug rug. This one was a simple log cabin offset with two extra strips on the side. I saw someone else make a similar mug rug, and I feel terrible because for the life of me, I can't remember where I saw this, but I really liked the idea. White binding was perhaps not the smartest choice in case of a spill, but I really like how it looks. The scraps are from my first quilt. And of course, my paperchase polka dot mug completes it. But then, paperchase mugs make most everything look better.
I cut into my fabric for quilt #5 this week. Sure, I completely skipped quilt #4, and while I've basted quilt #3, I've yet to do any quilting on it. However! I need to get #5 done quickly, so off I go! Photos of beginning progress...maybe tomorrow? We'll see how I'm feeling.
How about you? Do you make gifts? If so, give me some ideas! I don't think I can gift everyone I know with drawstring bags and mug rugs!
That being said, I did decide that this year I wanted to start making more gifts. The plan is that it will encourage me (hopefully) to plan ahead for birthdays instead of waiting until the last minute and then freaking out because I can't think of a gift. I made these things awhile back, but I needed to make sure their recipients had received them before posting photos.
I found this tutorial from In Color Order for a drawstring bag. You may have seen them around. They are popping up everywhere! I've made three so far, but the third (my personal favorite) is waiting to be gifted, so no sharing just yet. I made these two from a stack of five fat quarters. I used ribbon instead of fabric for the drawstring, mostly because I have a huge tin full of reams of ribbon, and it seems like a smart idea to actually start using it instead of just purchasing it when its on clearance. I really do love these bags, and hopefully I'll get around to making myself some soon.
Speaking of gifts, I've been trying to use more gifts bags because hopefully they are re-used by their recipients, but wouldn't these also work as great gift bags? Let's be honest, I also adore bagging stuff because it's much much faster than wrapping with paper. Hopefully I'll get around to making some of these before the holidays.
Inside of these two bags, I included a box of tea and a mug rug. This one was a simple log cabin offset with two extra strips on the side. I saw someone else make a similar mug rug, and I feel terrible because for the life of me, I can't remember where I saw this, but I really liked the idea. White binding was perhaps not the smartest choice in case of a spill, but I really like how it looks. The scraps are from my first quilt. And of course, my paperchase polka dot mug completes it. But then, paperchase mugs make most everything look better.
I cut into my fabric for quilt #5 this week. Sure, I completely skipped quilt #4, and while I've basted quilt #3, I've yet to do any quilting on it. However! I need to get #5 done quickly, so off I go! Photos of beginning progress...maybe tomorrow? We'll see how I'm feeling.
How about you? Do you make gifts? If so, give me some ideas! I don't think I can gift everyone I know with drawstring bags and mug rugs!
Subscribe to:
Posts (Atom)