Showing posts with label bags. Show all posts

Thursday, August 24, 2017

Gatherer Crossbody Bag, Take 1


They said it couldn't be done, but did I prove them wrong? OH! Absolutely.

I made a bag other than a 241 tote. Who knew?

This is the Gatherer Crossbody Bag, and it's a pattern from the same designer as the 241 tote, Anna Graham of Noodlehead. Like the 241, the directions are super bomb. I feel like this bag came together a lot faster than the 241--but that could be because there were no zipper installations. Though there was piping, and that was a new adventure...hmmm...I don't know. All that to say, this pattern was super cool, and it's FREE, so there you go.


I did make a few modifications to this bag. I actually increased the size of the pattern pieces, though I couldn't tell you how much as I have no clue! But it makes for a bigger bag, which is sweet. I used a magnetic closure instead of the leather/button combination. I used canvas for the exterior (Lizzy House's Nosara Canvas in Blue) and a quilting cotton for the interior and extra details (Laura Gunn's Painter's Canvas...probably in Lagoon). Finally, we opted for a 1.5" strap sewn into the lining rather than the super cute (but not as durable) thin strap.

See, this is a replacement bag for a friend who wore the last bag I made for her into ruin. You might think that's an over-exaggeration, but trust me, it's time for that 241 Tote to be retired. It has given more than any bag should ever have to give! And this new bag has been made to hold up for just as long, and hopefully longer.


I sewed the bag up, but the strap was much too short, so I performed a bit of surgery, and now it's all gravy. Bonus, I found a way to get to the post office this afternoon, so as we speak, it is on the way.

This was a super fun bag to sew up, and I have fabric cut and prepped for another one--this time for me! 

Saturday, June 17, 2017

241 and Done!


Another 241 tote is in the books. I had to special order hardware to finish it--1.5" slide adjusters aren't common, I guess--and only realized after I'd placed my order that it was shipping from Malaysia! But it arrived last night, and of course the first thing on my mind when I woke up this morning was finishing this purse. (But first--coffee and taking care of kidlets and other mommy stuff.)


When the baby went down for her nap, I practically ran to my sewing machine. Sorry, dirty dishes, you'll have to get in line. It was time to finish this bag! (And now the dishes are waiting for this blog post. #priorities)


For my friend's bag, I used a canvas exterior with quilting cotton for the sides. I interfaced this bad boy with fusible fleece, added an exterior zip pocket and interior slip pocket as per pattern instructions, but I opted to also include a second interior slip pocket, this one sized for a writing instrument or two.


For those of you following the great strap debate--we opted for the bunnies! I think they look so good with the bag. But the mountains peek out too, so they weren't completely lost. I used that slide adjuster in making an adjustable strap for the bag.

I am totally in love with this bag. I seriously wish it was sticking around with me. I figure if I love it so much, there's a good chance my friend will be pleased as well, right?

This is my third finish from my Q2 FAL list, but I just realized I haven't talked about my second finish! And if I could just finish that quilt that is looming every time I walk near my sewing nook, I would be 4 and 0! That's motivation to get 'er done, let me tell you.

Saturday, June 3, 2017

Yes, Another 241 Tote.


Maybe I should rename this blog Hot Pink 241 Totes? Because I sure do make a lot of them! But I think you're right--it doesn't quite roll off the tongue the way Hot Pink Quilts does, so we'll stick with HPQ, and eventually maybe one of these days I'll get around to photographing the quilt-in-progress I'm working on. Maybe one of these days I'll actually get it done! But until then--241 Tote time!


I honestly don't know what number 241 tote this is for me. Eight? Nine? TEN? Suffice to say, I've made a ton of them. This time, I'm making a commissioned one. And if I'm going to make a commissioned tote, you'd best be believing it's going to rock and be exactly what that person is looking for in their heart of hearts.

We started with choosing a canvas for the exterior body of the bag. I love this print from Tokyo Train Ride. (We'd also considered a Melody Miller canvas and a few others, but we came back to this one, and I'm so glad we did. It's been magical watching it form.) I used fusible fleece interfacing, so this bag is good and solid.


I got the exterior mostly put together, went to insert the zipper, and face palmed as I had FORGOTTEN to buy a zipper. Bravo, Audrey! A few days later, I rectified that mistake. The super thick nature of the canvas + fusible fleece made it difficult to insert the zipper cleanly, so I did my best.


The interior (not pictured) came together without complication, including the pen pocket I added. I pressed fabric for the handle, choosing to fussy cut (ish) the mountains thinking they looked pretty bomb. But on the reverse of the mountains, quite by accident, there is this SUPER CUTE line of bunnies. Now, you'll be able to see both sides of the handle, but one side will be prominent, and choosing one which side to face out was hard! I took to instagram (thank you, friends for your input!) and chatted with my friend who commissioned the tote, and we made a decision, but I think I'm gonna have y'all wait until the end to see what we chose!


And when I went to finish up the adjustable strap--I use this tutorial, though I did modify it this go around, more details in the finish post--I realized I ALSO had neglected to buy a slide adjuster. Rather, I had one on hand, but I hadn't considered that it's 1" wide when I need one that is 1.5" wide. Finding one has been an awful pain, and I finally thought to check etsy, and sure enough, there were like fifty million listings.

When that slide adjuster arrives, this bag should come together in twenty (or so) minutes, and I am SO eager to have it done because it already looks pretty smart, so don't you think it'll look even better when complete?

Monday, January 30, 2017

Sew Together Bag for K


Just in case you haven't had enough Sew Together Bag goodness, here is another one for your viewing pleasure! I made this bag for my quilting sensei K, and I'm kinda in love with it. It is a sign of how much I value our friendship that I sent it along.


I tried to go more demure, but the Audrey in me kept coming out. Even though it's not pink, there is probably no mistaking who made this bag.


I made this one assembly-line style along with the one I made for my friend L, and let me tell you, I got to be a machine when it came to the zippers. This is some of my best zipper work, y'all. Just sayin'.


And the two bags side-by-side. I love both of them! And I'm glad to have two more under my belt. This is finish #3 from my Q1 FAL list, woo!

Thursday, January 26, 2017

Sew Together Bag for L


BAM! Finish #2 from my Q1 FAL list. If you take into consideration that this is a super late Christmas gift, it's not as impressive of an accomplishment, but I'm going to take the optimistic angle of looking at it and go with super awesome!


This is my third Sew Together Bag, and I'm getting better. I've pretty much figured out how I like to do things at this point, and I went with it. The outside is a scrappy blue QAYG panel. It was fun to use some of my favorite prints in this panel, including my most favorite batik ever. Yes, I used the "b" word, but sometimes batiks are yum!


And the inside is some woodland prints! I had a lot of fun making this, and I hope my friend L can put it to good use.

In a few days, I'll be showing your my fourth Sew Together Bag, woo!

Tuesday, December 6, 2016

Ramona Flowers Bag.

Earlier this fall, a box showed up in my mailbox from my friend L. I knew it was my birthday present, and I knew she had spent a complicated and lengthy time concocting it, but I had no idea what the contents would be. When I opened it, I pulled out a bag and immediately started crying.


Pretty sweet bag, right? And it's definitely something I would rock, but that's not the reason I started crying. I started crying because I had wanted to cosplay as Ramona Flowers for Free Comic Book Day back in May, but after doing some quick research, I realized I would absolutely have to have Ramona's magical bag of magical bagness, and there was no way I was going to pay a kajillion dollars for one that someone else had made, and there was no way I was going to make one in the very limited time I had, so Ramona Flowers was off the table, and I figured I'd have plenty of time to figure out the bag before next May.

Except L did that for me. Cue crying.


Did I mention the bag is reversible? I don't even know how she figured it all out, but she did. This is her creation, and it probably took her a million years to make, and how do you say thank you and worse, what do you make/get her for her birthday next month? Eep! (I have some ideas....)


And while it's only December, I need to start working on my Ramona dress. Because if I have a bag this year, I better make sure my outfit it totally epic. (AND IT WILL BE.)

So thank you, L, for my awesome bag of magical Ramona bagness. And thank you for being such an awesome friend. I heart you mucho.

Wednesday, October 19, 2016

Boo's Sew Together Bag


I made another Sew Together Bag! And it was way easier! Yay!

My sister has a November birthday. Since I might feasibly be having a baby on her birthday, it seemed prudent to finish up her gift early. My sister has a serious love for gray and yellow, so I cut into my cherished Echo fabric to make her a Sew Together Bag. (You know you love a person if you're willing to cut into your Echo.) When I first started quilting, Echo was one of the first collections to catch my eye, and working with it reminded me of my early days of quilting.


And this is the finished bag. I changed a few things from my first sew together bag, and I don't think I'll repeat any of them. Good experiment, but not what I wanted, you know? On the one I made for my husband, I used home dec scraps and duck cloth for the exterior, which already gave it support. The added batting further stabilized it. For this one, I used quilting cotton and batting for the main panel, but I also used batting to support the side pieces, hoping it would be enough. It works, but they are a little floppy--not the crisp edges that my husband's show.

I chose not to interface the pockets because interfacing and I are involved in a major feud at the moment, and I was using a light yellow fabric that I didn't want to scorch like the fabric I scorched the last time I tried to use interfacing. The outer zipper and batting give it enough structure to keep the bag from flopping over, but it is floppier than my first. Apparently forgetting the interfacing isn't an option for me, at least not when using quilting cottons.

My last change was how I attached the binding to the bag. On my first, I sewed it first to the interior, then onto the front. For this one, I sewed it first to the exterior, then onto the inside. I will definitely sew it first to the interior next time as I really appreciated how much cleaner the binding looked on the exterior of the bag.


The inside is lined with a yellow polka dot that was from my grandmother's stash. I thought my sister would appreciate the family touch, and she had better as I used up all of it on this bag! But it's such a happy fabric too, and I think it gives a nice touch to the interior. And I purposefully used a hot pink zipper so that every time she opens it, she'll think of me! (But I left it on the inside as I know it's not her favoritest color in the entire universe, which seems a bit crazy to me--who doesn't love hot pink as much as I do??? Honest answer: pretty much everyone.)

This is my first finish from my Q4 FAL list. At least I managed to knock one thing off before Vanilla makes her appearance!

Wednesday, September 7, 2016

Pencil Bags.


Do you ever have a project that you need to do, you want to do, but you can't seem to work up the motivation, and there's a deadline looming up ahead? I felt this way with these pencil bags.

Our homeschool co-op starts meeting next week, and I really really really wanted to make some pencil bags for my boys. It's my middle's first year of co-op, and he is so excited about his new backpack and new crayons and new sneakers. I figured I would make him a new pencil bag too. And if I made him one, better make one for my oldest too.

But for some reason, it was soooooooo hard to make these. Not because the pattern was hard. Just...I didn't want to. At first, I told myself I had plenty of time, and then, I was just procrastinating. I've had the fabric cut and ready for at least a couple of weeks, and today I finally just sat down and made myself do it.

And was it painful? Of course not.


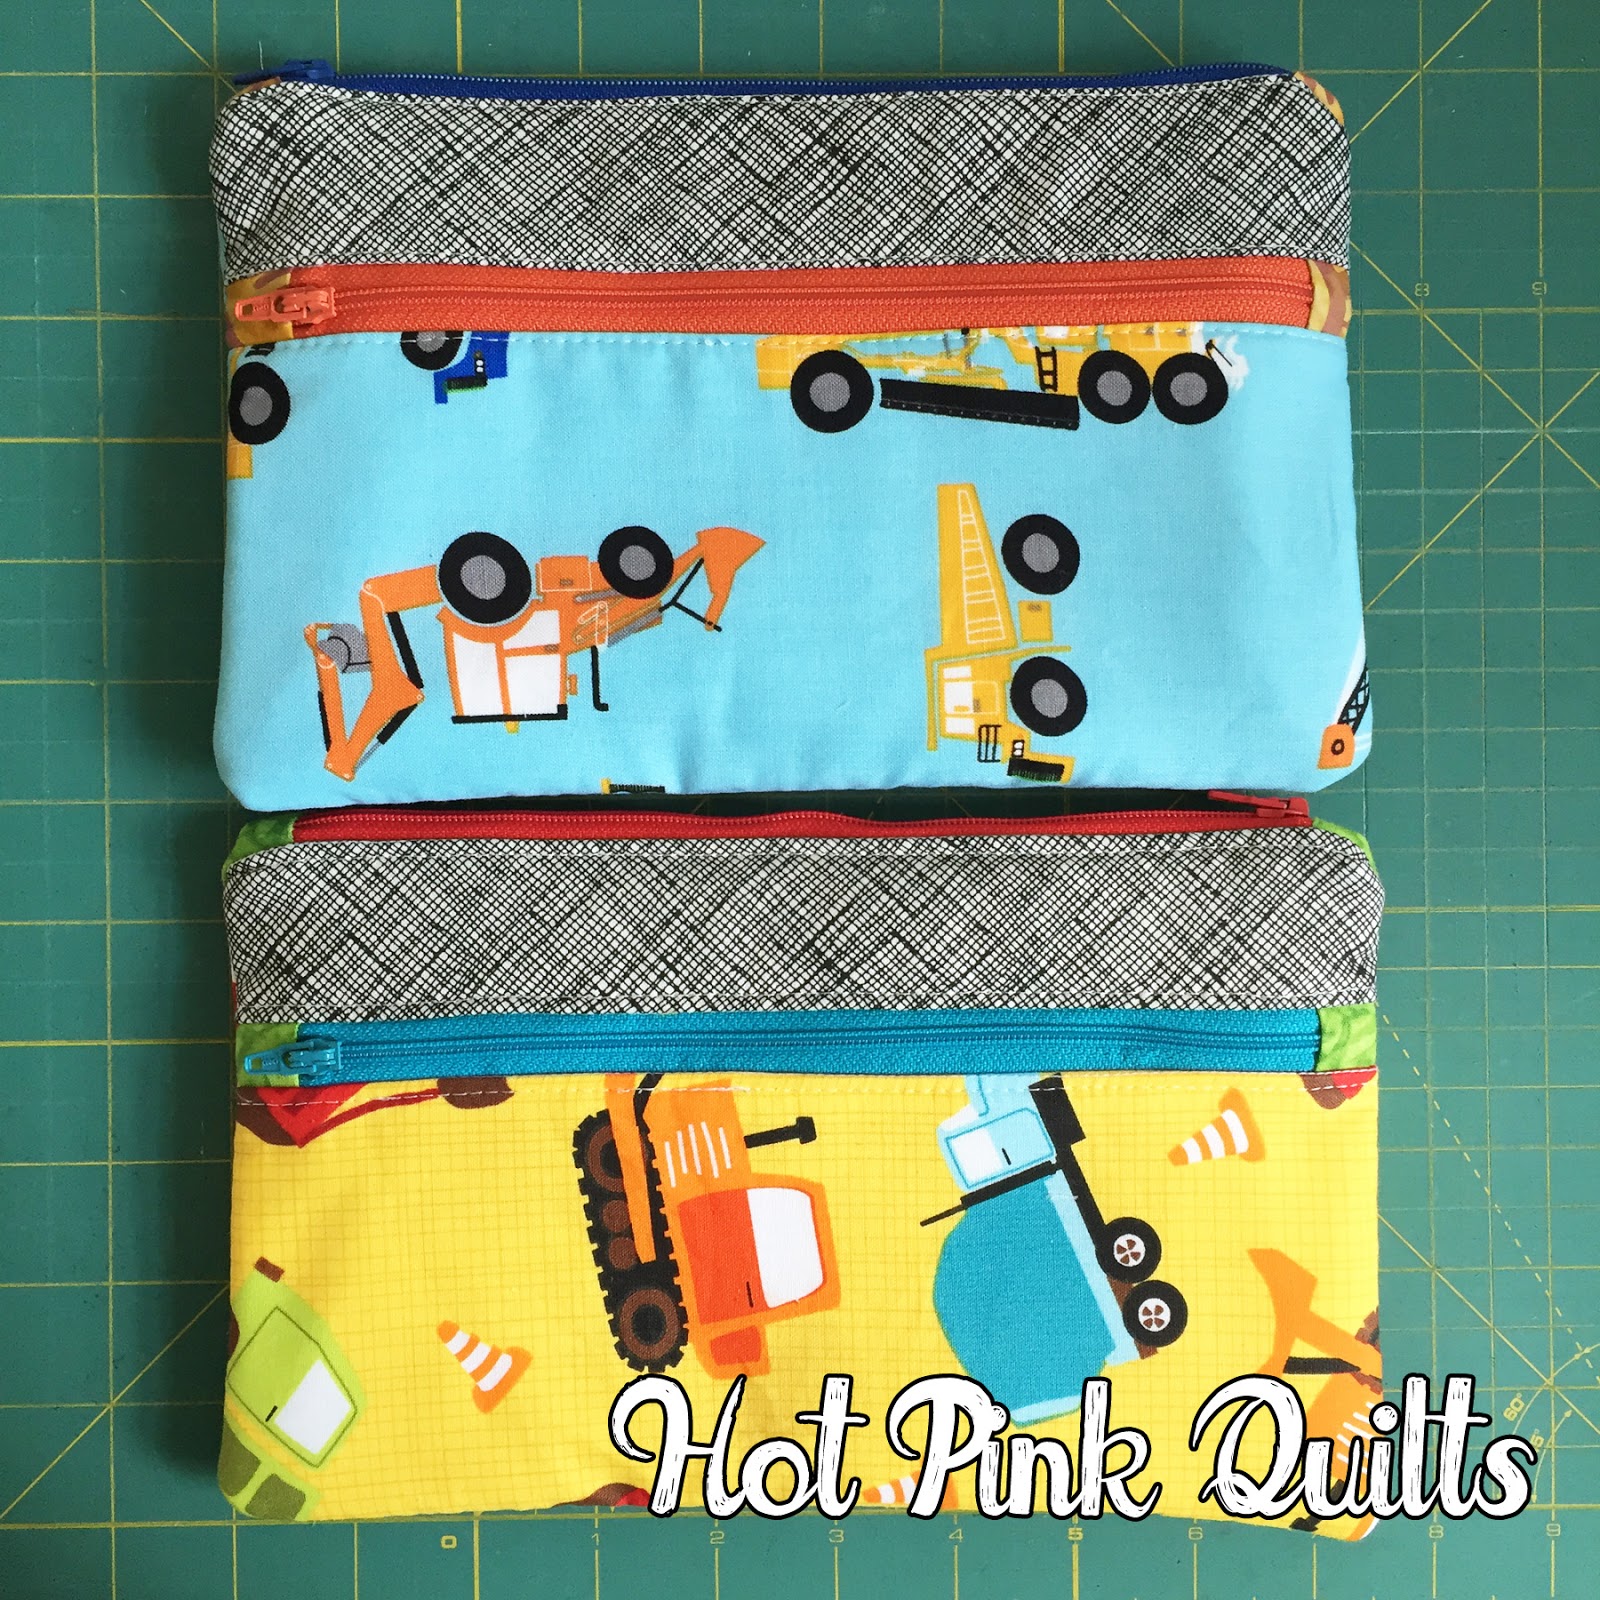
I used this awesome tutorial from The Cottage Mama to make a couple of Three Ring Binder Pencil Bags. I first considered making the Triple Zip Pouch from A Quilter's Table, but I only wanted two zippers per bag, so I was stoked when I found this tutorial.

I did make a couple of changes to my bags. I used batting instead of fusible fleece because I'm a quilter and have batting scraps en masse. (Also, fusible anything and I are on a serious break because we have a tumultuous relationship.) I didn't include the rings because my kids don't have a three ring binder, and by the time they do, I'm guessing they may not want truck pencil bags. I feel like I made some other changes...but maybe not? I can't remember any more.


I didn't snap a picture, but I also made a truck-themed lined drawstring bag to house my middle's snacks--my oldest already has a helicopter one that he used last year. They are both very excited about their new bags, but also to be starting co-op!
This is our fourth week of school, and I'm happy to report that it's going well. And now that I have BTS sewing done, I can get back to working on Lito's big boy quilt and Vanilla's baby quilt guilt-free!

Thursday, June 30, 2016

241 Tote Number 9.


I jokingly posted last year that I was building an army of 241 totes, but I don't think I can really consider that a joke any more. Today's version is number nine, baby, and like EVERY SINGLE ONE I MAKE, it might be my favorite yet.

But seriously. How could I not love this one? 


It's uses my all time favorite color combination--red, pink, orange, and yellow with navy. It features this awesome print by Melody Miller. And I think I finally nailed everything exactly right on this version. I clipped where I needed to clip. I didn't have to use my seam ripper once! I made the handle properly, plus, I attached it properly. My interfacing behaved. My zipper insertion was painless! (Okay, I wish I had remembered to topstitch the top with pink thread too, but if that's my only regret, I'll embrace it!)


This one is for me. No, really. Out of the nine I've made, this is only the second that is hanging around with me, and only because my first one is so well-loved. After almost two years of near daily use--I LOATHE switching purses--it is still in excellent shape. I just really wish the strap was longer on it so that I can wear it cross-body. This new one will take care of that.

I actually bought some Tula Pink Elizabeth fabric ages ago with the intent of making one an Elizabeth cameo on the exterior panel, but then I bought this fabric for something else and immediately knew it had to be a 241 for me.

Best of all, this is a finish from my Q2 FAL list, which is mostly untouched. I knew this quarter would be wild busy with other life business, but even still, I was hopeful to get to more projects. Q3 looms in the distance, and I'm already plotting my next lovely list of lovely.

What is your most well-loved pattern? I'm working on birthday/holiday gift ideas, and I need some input, y'all.

Saturday, April 9, 2016

Q2 2016 FAL List

Friends, Q1 saw three finishes--almost four!--from eight proposed WIPs. I am pretty stoked about those finishes because they were well earned. And this quarter has a list just as exciting as Q1, if only because I have about a kajillion baby quilts to finish. (This list only has the three I've planned so far!)


1. Negroni shirt for husband 
I completed a muslin that was waaaaaay too big. 
I need to make another before proceeding.


2. Hot Pink Socks
One sock is knitted; I've turned my heel and need to finish up.
DONE


3. Midnight Mystery Quilt
Top needs borders, baste, quilt, bind


4. 241 Tote for Me
Planning to use some C+S and other prints; materials gathered
This will probably not happen. But I can dream.
DONE


5. Baby Quilt for Mel
Fabric cut; needs assembly
DONE


6. Baby Quilt for B
Fabric and pattern assembled


7. Baby Quilt for A
7/9 blocks made; need to sash and join


8. Quilt for K
blocks done; need to sash and join

I'm linking up! Are you? 
2016 FAL

Friday, January 15, 2016

FF: Kim's 2nd 241 tote


For Christmas 2014, I made my friend Kim a 241 tote. She went with me to my LQS, and we picked out fabrics so that I would make her a tote she would really really love. AND THEN. Disaster struck. The front panel of her bag got some sort of crazy rip, and she was oh so sad. And rightly so because that bag was totally boss. I mean, she got a good 10-11 months of almost daily use out of it, but still. it was devastating.

I had this idea--why not make her a near identical bag for Christmas this year? So I did. I was able to find the same floral print at my LQS, and the same pocket print, and I used a green dot from a Bonnie and Camille line for the side bits. (Speaking of those side bits, I recently saw a 241 on instagram with quilted side panels and it was divine. I so want to try that out sometime.)


Other than a couple of different fabric placements, I also put a zipper in on this one. My first zipper on a 241, which is slightly shameful since I've made about a million of them. The zipper insertion was cake, especially now that I have an actual zipper foot, but I will say, having to wrangle zippers using a regular presser foot has given me some skills.

(I *might* have another 241 planned, and I *might* have purchased a zipper--or two!--for that one as well.)


The inside is more of the green dot and the focus print, but I used some mini pearl bracelets in hot pink for the slip pocket. I also added a magnetic clasp on this version--the previous Kim bag didn't have one.

Once again, I used fusible fleece interfacing, and once again, I loved it something fierce. I loved the first Kim 241, but I love this one MORE.

This is finish #1 from my 2016 Q1 FAL list. Hooray!

Saturday, January 9, 2016

Q1 FAL List 2016

Can I add about twelve exclamation points to this post's title! O to the M to the G, I am so excited to be starting off 2016 with another delicious FAL list into which to sink my teeth. Can you feel my excitement? Better yet, do you share it?


1. Frozen Watermelon Quilt
Top done, needs to be basted, quilted, bound
DONE


2. Dad's Star Quilt
DONE
Top done, needs to be basted, quilted, bound


3. Negroni shirt for husband
THIS IS SHAMEFUL. I have done NOTHING. (Mostly because I'm terrified.)


4. Hot Pink Socks
One sock is knitted; need to start and complete the second


5. Midnight Mystery Quilt
Blocks are done; need to finish assembling top, baste, quilt, bind


Pieces are cut
DONE


7. 241 Tote for Me
Planning to use some C+S and other prints; materials gathered


8. Dress for Me
By Hand London's Anna pattern; delicious yummy voile from Fancy Tiger Crafts

I'm linking up! Are you? 
2016 FAL

LinkWithin

Related Posts Plugin for WordPress, Blogger...